📄 About Self Attested Photo
A self-attested photo is simply a photograph that you verify yourself. Instead of visiting a gazetted officer or notary, you sign the photo and add your name and date to confirm that it is genuine.
Most banks, universities, and official employers now accept self-attested documents. This means you can certify that your own document or photo is a true copy of the original – instead of getting them stamped by a notary. For a photograph, you usually write "Self-Attested", add your signature, your full name, and the date on or next to the photo.
You can create a self-attested photo in seconds using our free Self Attested Photo Maker. Just upload your image, decide how you want to add your signature – you can draw it live, type it, or upload a scan– and enter the date and your name. Finally download the finished photo, and you are good to go. No need to worry about your privacy – all processing happens right in your browser. That means your photo never leaves your device and is never sent to or stored on any external servers.
🤳 Take a Good Selfie Before Creating a Self Attested Photo
A clean, clear photo makes your self-attested copy look sharp and professional. Keep these four points in mind before you upload.
Use Natural Light
Shoot near a window in daylight instead of using flash or dim indoor bulbs — natural light keeps your face evenly lit and free of harsh shadows.
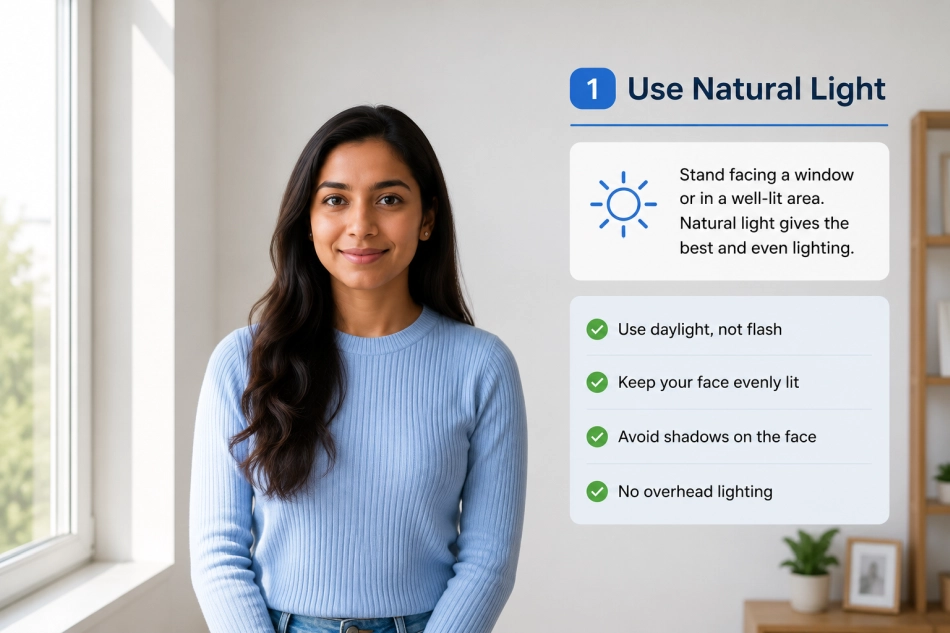 Natural light
Stand Against a Plain Background
Choose a plain wall or solid backdrop so the focus stays on you — busy or cluttered backgrounds can make the photo look messy on official documents.
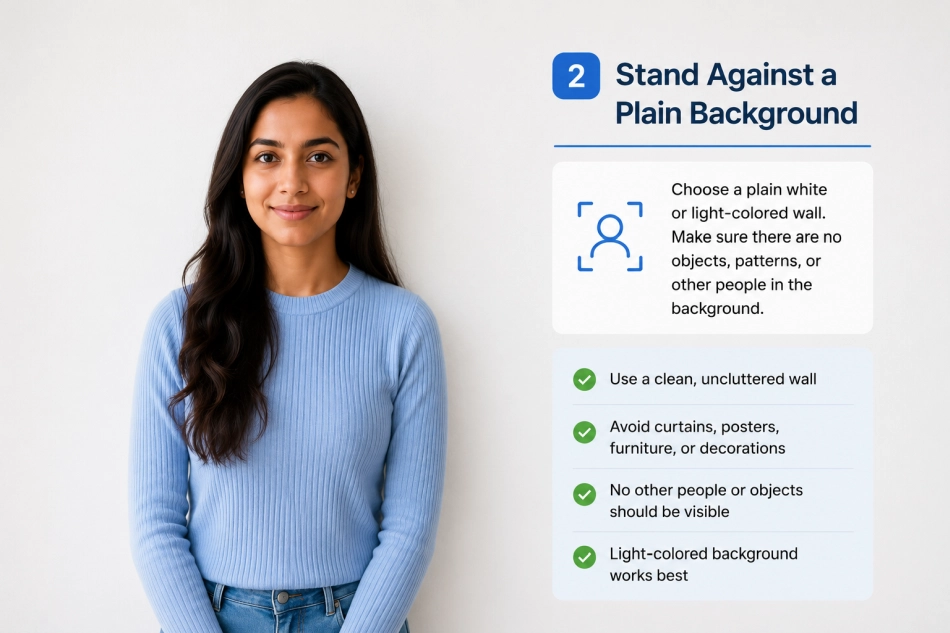 Plain background
Keep the Right Distance
Stand a few feet from the camera so your head and shoulders fill the frame naturally, without distortion from being too close.
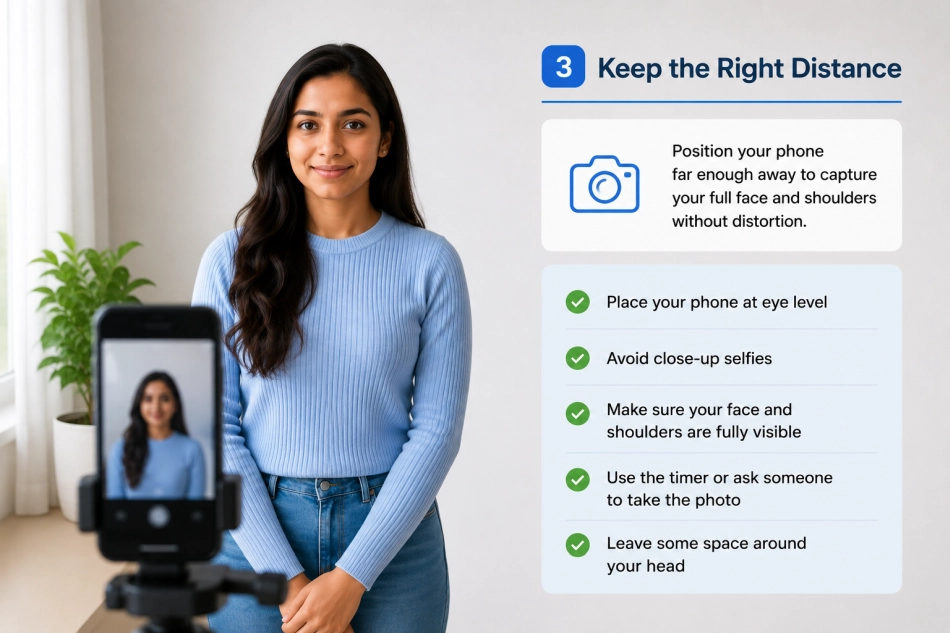 Right distance
Look Straight at the Camera
Face the camera directly with a neutral expression and level head — this keeps the photo clear and consistent for identification purposes.
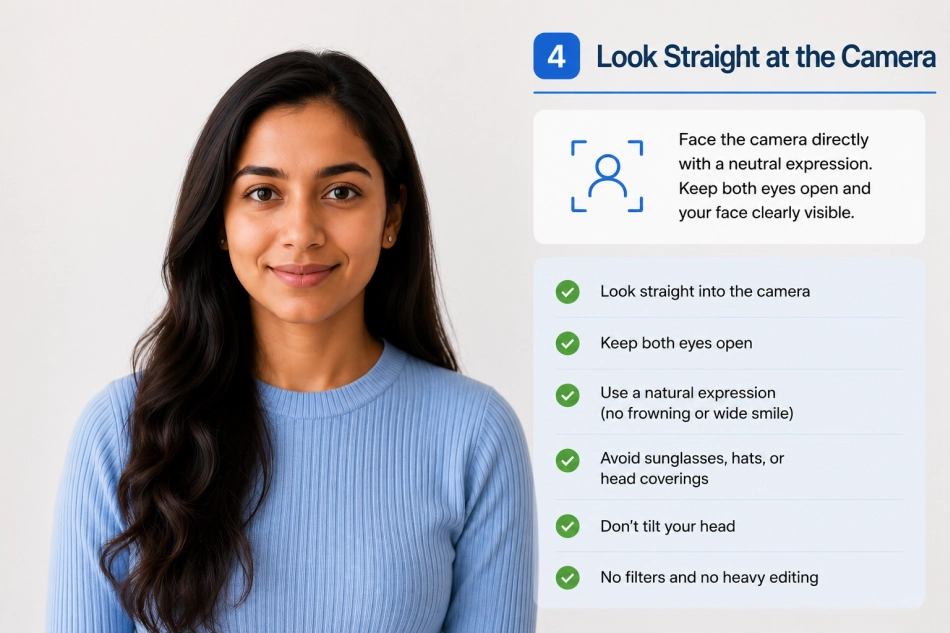 Look straight ahead
🛠️ How to Create a Self Attested Photo Online
You can create a properly attested photo in four simple steps — no design skills or software needed.
- Upload your photoClick the upload box or drag and drop your JPG, PNG, or WEBP image. It loads instantly and privately in your browser.
- Add your signatureDraw your signature with a mouse or finger, type your name in a signature font, or upload a scanned copy of your handwritten signature.
- Enter your details & style itAdd the “Self Attested” text, your full name, and the date. Adjust the size, rotation, colour, and placement — on the photo or on a clean white strip below it.
- Download or printChoose PNG or JPG and download your attested photo, or print it directly. Your image is ready to attach to any form or application.
⭐ What Makes Our Self-Attested Photo Maker Different?
Built to be fast, private, and genuinely useful — not just another watermark tool.
Your photo is processed entirely in your browser and never uploaded to a server. Nothing is stored or shared.
Draw, type, or upload a scanned signature — whichever is easiest for you, on any device.
Adjust text, size, rotation, opacity, colour, and position. Drag the stamp anywhere on your photo.
Keep the attestation on the image, or add a clean white strip beneath it — just like a physical attested print.
No app or sign-up. Works on Android, iPhone, tablet, and desktop, and is fully mobile-friendly.
Attest as many photos as you like, download in PNG or JPG, or print — all completely free.
📌 When & Where Do You Need a Self-Attested Photo?
Self-attested photos and documents are requested across many everyday applications, including:
- Government & competitive exam forms — applications for recruitment boards and entrance exams often require self-attested photographs.
- University & college admissions — enrolment, scholarship, and hostel forms frequently ask for attested photos and documents.
- Bank & KYC processes — opening accounts, loan applications, and Know Your Customer verification.
- Job applications & onboarding — employers may ask new hires to submit self-attested photos and ID copies.
- Passport, visa & government IDs — some supporting documents require self-attestation.
- Legal, property & official paperwork — affidavits, tenancy, and registration documents.
Always check the exact attestation wording and format your specific authority requires before submitting.
✅ Self-Attested Photo Do's and Don'ts
👍 Do
- Use a clear, recent, front-facing photo.
- Sign with the same signature you use on official documents.
- Write your full name legibly, matching your ID.
- Add the correct current date.
- Keep the signature and text off your face where possible.
- Follow the exact wording the authority asks for.
👎 Don't
- Don't cover important facial features with the stamp.
- Don't use a blurry, edited, or heavily filtered photo.
- Don't backdate or use an incorrect date.
- Don't use a signature different from your official one.
- Don't shrink the text so small it becomes unreadable.
- Don't assume every office accepts self-attestation — confirm first.
Frequently Asked Questions
What does “self-attested” mean?
Self-attested means you certify, yourself, that a photo or document is genuine — by signing it and adding your name and date — instead of having it verified by a notary or gazetted officer. It is a declaration that the copy is true to the original.
Is this self-attested photo maker free to use?
Yes. The tool is completely free with no sign-up, no watermark, and no limit on how many photos you can attest and download.
Are my photos uploaded to a server?
No. All editing happens locally in your web browser. Your photo never leaves your device and is not stored, uploaded, or shared with anyone.
How do I add my signature to the photo?
You have three options: draw your signature with a mouse or finger, type your name in a handwriting-style font, or upload a scanned image of your signature. Pick whichever is most convenient.
What should I write on a self-attested photo?
Typically you add the words “Self Attested”, your signature, your full name, and the current date. Some authorities specify exact wording, so always follow their instructions if provided.
Can I place the attestation below the photo instead of on it?
Yes. In the Details & style step, choose “Below the photo”. This adds a clean white strip beneath your image and places the signature, name, and date there — similar to a physical attested print.
Which file format should I download — PNG or JPG?
PNG gives the highest quality and is best if the form accepts it. JPG produces a smaller file, which is useful when there is a file-size limit. You can choose either before downloading.
Can I use this on my mobile phone?
Absolutely. The tool is fully mobile-friendly and works on Android, iPhone, and tablets. You can even draw your signature with your finger.
Do all offices accept self-attested photos?
Many government departments, banks, schools, and employers accept self-attestation, but not all. Rules vary by organisation and country, so always confirm the requirement with the specific authority before submitting.
Can I resize or compress the photo to meet a file-size limit?
Yes. Use our Photo Resizer & Compressor to resize by dimensions or percentage, or compress the image to an exact KB limit — perfect for forms that cap the upload size.